By Amelie Keane
Identifying live British and Irish myriapods can be quite challenging due to their identification features usually being quite small. Below are a few ways that I have been using to identify living myriapods over the past 1-2 years. Disclaimer: I am not claiming to have invented these techniques and I am aware they have probably been used by many people before me. This is just a collection of things I have found useful.
A conference badge holder will become your new best friend when you are out looking for myriapods. This allows you to gently contain and restrain the myriapod to be able to look at and photograph the ID. In addition to this, I have occasionally used 2 microscope slides stacked on top of each other with a small piece of blu-tack at either end. The organism never comes into contact with the blu-tack, it is only there to adjust how tightly the slides are held together. This is a lot trickier than using a conference badge holder and gives the myriapod more chance to escape.
A small plastic tub or a petri dish is useful when collecting specimens. When I pick up specimens, I usually end up picking up a lot of debris with it. Debris can make the conference badge holder dirty and obscure the organism. I usually place the specimen in a plastic tub or petri dish and remove the dirt/debris with tweezers before transferring it to the conference badge holder. Tissues or a cloth are useful to use to clean the conference badge holder from dirt and moisture.
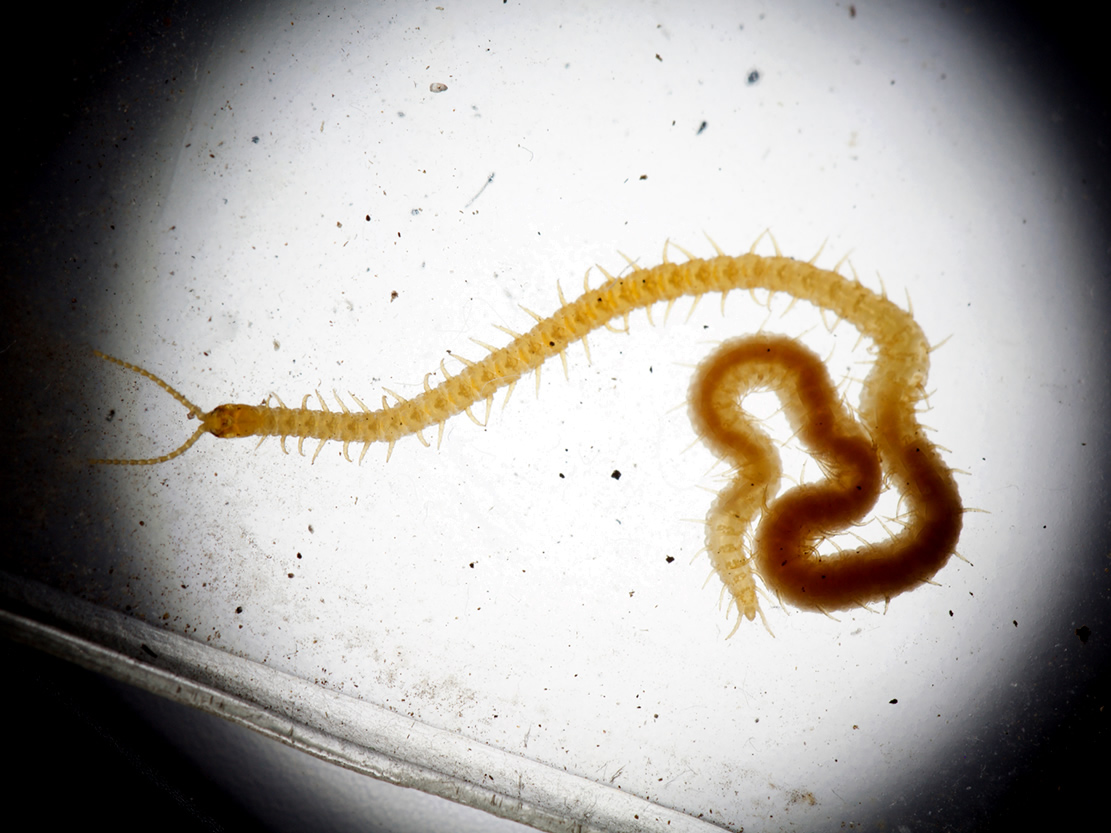
A torch can be quite helpful to highlight structures. I usually place a torch on the ground with the light pointing upwards. This allows me to place the conference badge holder with the specimen over the top of the torch and then my camera above it, mimicking a microscope. Moving the torch so the light is shining from the side of the specimen can also be used to highlight subtle structures like the carpophagus fossae. I use a small cube shaped torch with a white plastic diffuser over it. However, a regular torch with a piece of paper over the top should work fine. Always be careful when using a torch that you don’t stun yourself by looking directly into the light (I’ve done that too many times!) The use of a diffused torch can be seen in the two images of Geophilus electricus below. The first shows the presence of sternal fossae and over 60 leg pairs; the second the ventral coxal pores.
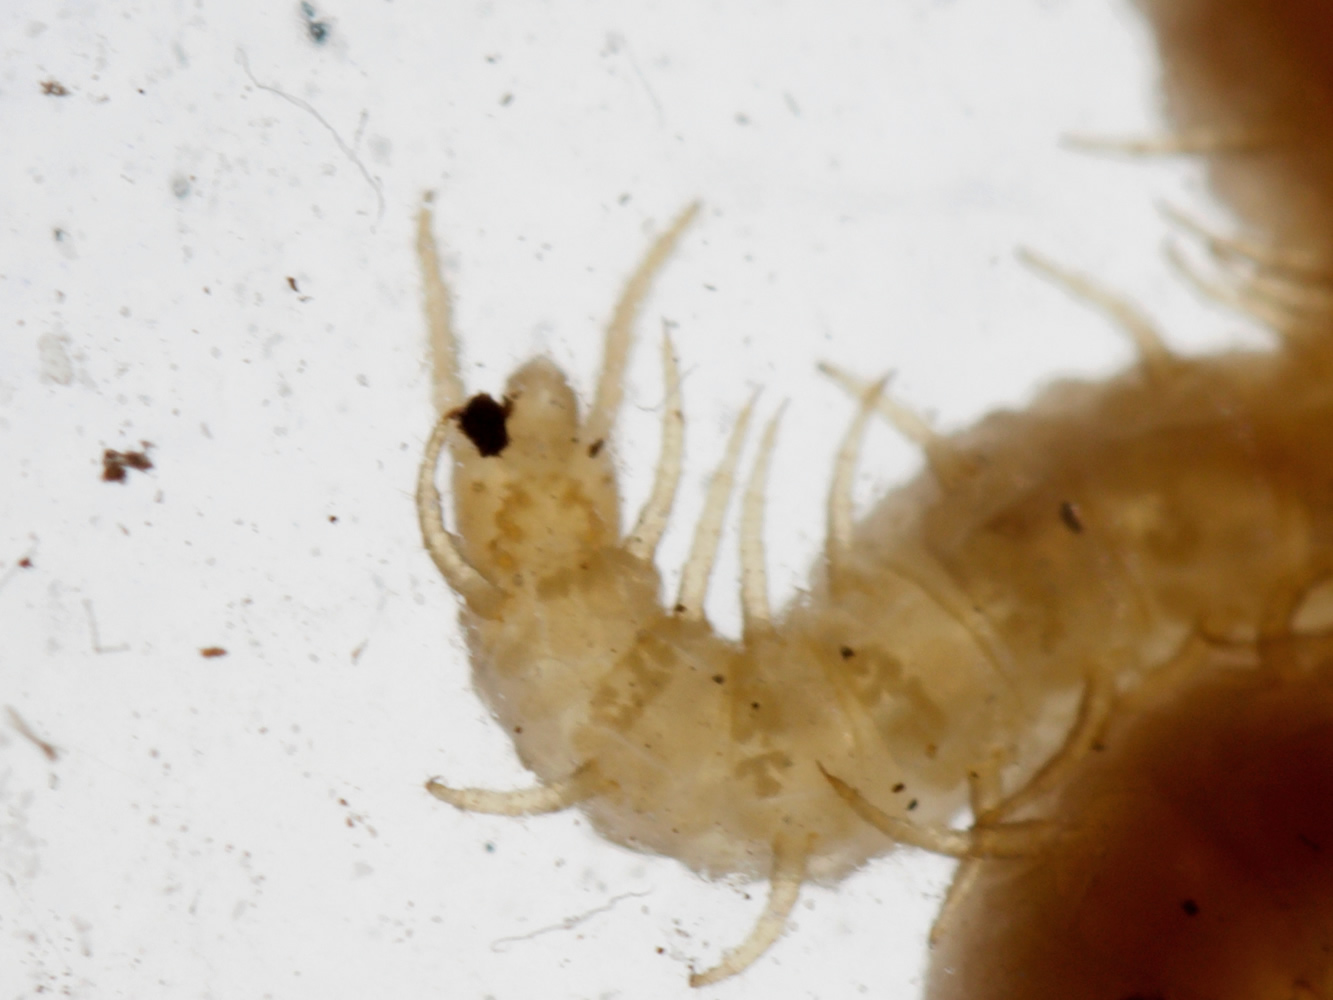
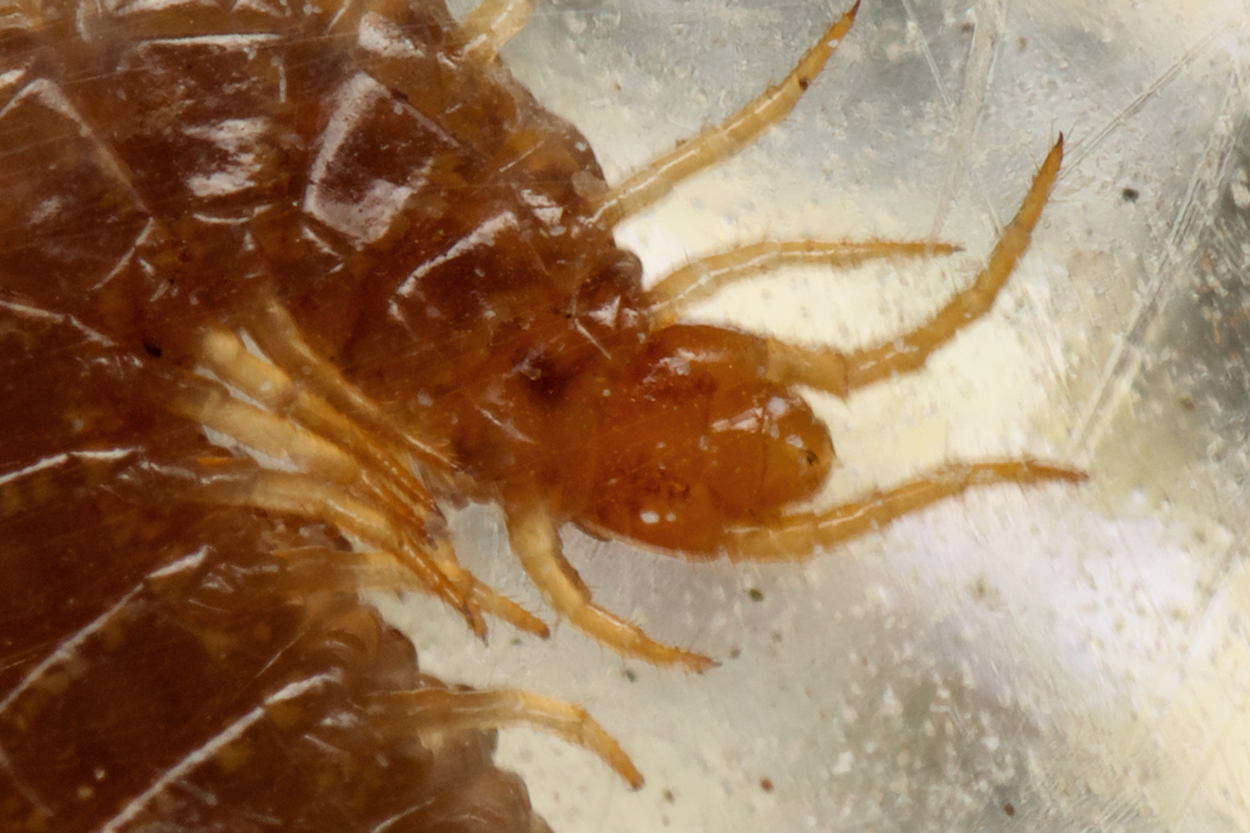
 Due to all of the wild myriapods in the UK and Ireland being tiny, a lot of magnification is needed to ID the more confusing ones. I started out with a phone clip-on macro lens. This is a small inexpensive lens (mine was roughly £10) that clips onto your phone and enhances the magnification of your phone’s camera. I found this easier to use than holding up a jeweller’s loupe to my phone camera because the lens holds itself in place, allowing one hand free to hold the conference badge holder. An example as to what an observation using a clip-on lens might come out like can be seen in the image to right. This shows the diagnostic modified fore legs of a Julus scandinavius male.
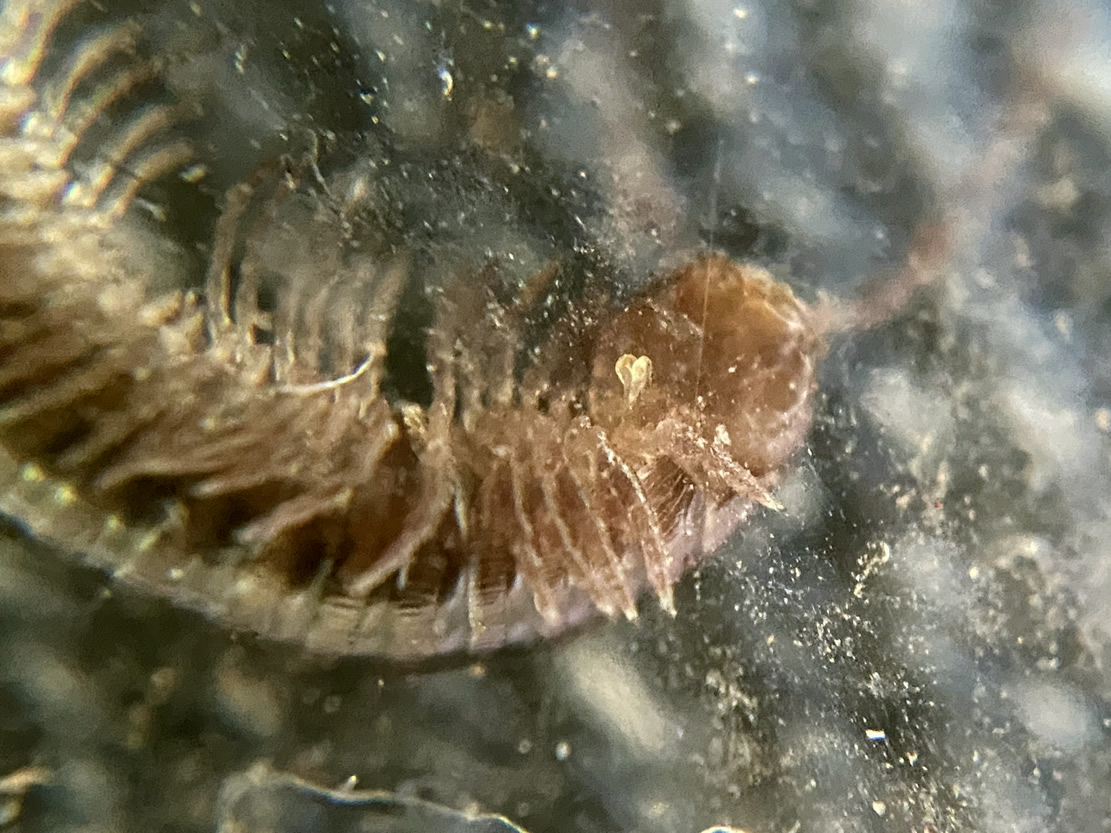
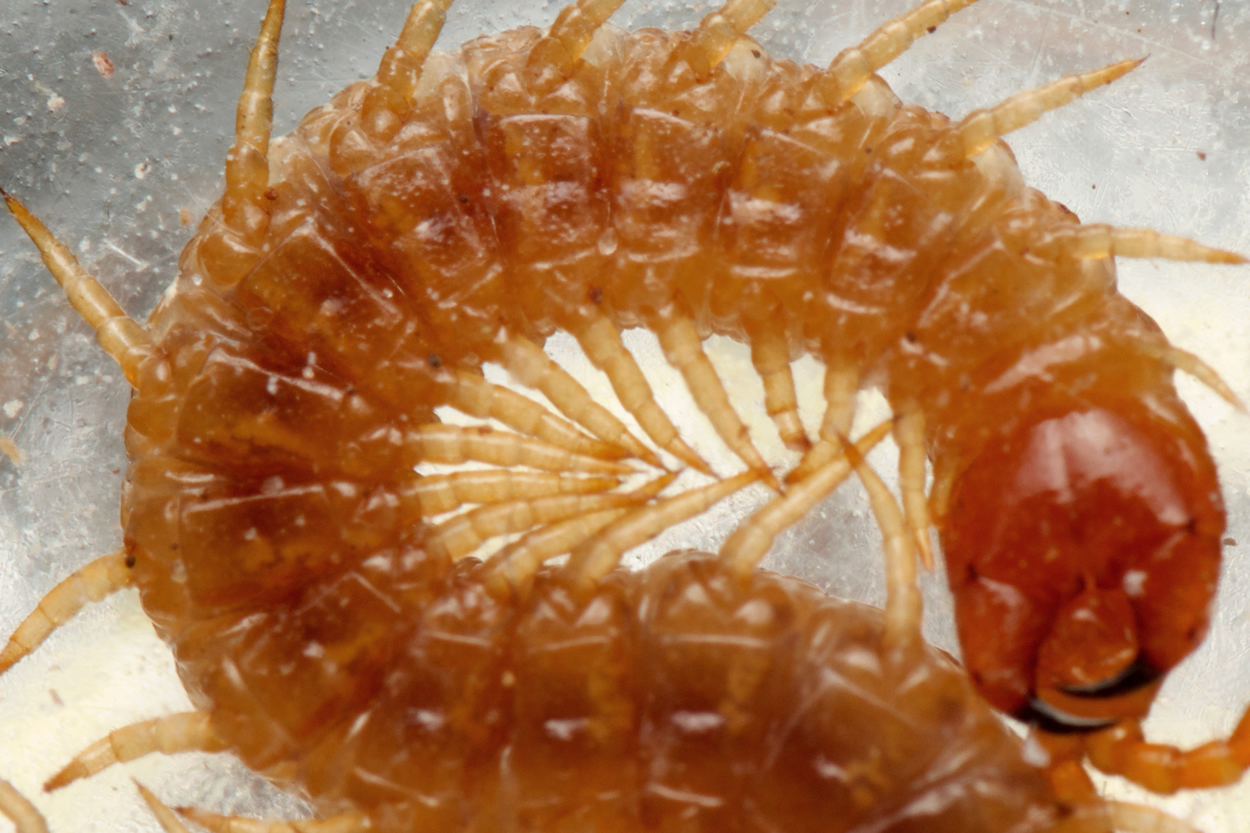
I have since upgraded to a DSLR with a camera macro lens that can reach 2:1 magnification. So far I have found the magnification, resolution and the adjustable camera settings all make taking pictures of live specimens a lot easier than using my phone. Before I had the macro lens, I used a kit lens with extension tubes which also worked quite well. Using a camera flash and diffuser has helped make things easier and gives me more flexibility with the camera settings. Investing in a small tripod might also be beneficial because holding a camera with a flash and heavy lens attached to it with one hand is quite uncomfortable (though admittedly I am still yet to buy a tripod). Other cameras that can magnify the specimen enough will most likely also work well. One of my observations of Geophilus easoni using a DSLR camera can be seen below. The first shows the presence of diagnostic sternal fossae; the second the ventral coxal pores.
I have used a microscope a couple of times; however, I found this more difficult to use than a phone or camera for live specimens. Ultimately, it doesn’t matter too much on what you use to take a picture, as long as it has enough magnification. A few additional tips that can help when identifying live specimens:
• There are a few myriapods that can’t be identified to species without dissection. For example, differentiating Chordeuma sp. or Cylindroiulus britannicus and C. latestriatus can’t be done reliably without dissection (though I am happy to be proven wrong).
• Myriapods can be extremely uncooperative and difficult to work with. Sometimes a lot of patience is needed when photographing them live. If a millipede or geophilomorph won’t uncurl, I have found covering it with my hands for a minute or two gets it walking around.
• Become familiar with identifying features and take more pictures than you need. Even if you can’t identify a live specimen in the field, having pictures of all the possible ID features lets you ID the organism at home, without having to bring the specimen home. Taking multiple pictures of the same feature increases the chance of one of them being clear and usable.
• Looking at other people’s observations (or asking them how they took a photo) can help you to find ways of photographing ID features more easily. There are probably more ways to photograph live specimens that other people know about which aren’t mentioned in this article. All the myriapod and isopod enthusiasts I have come across so far are always happy to help, give tips and answer questions!